
 Herrmidifier CB300 Bypass Style Humidifier Repair Help
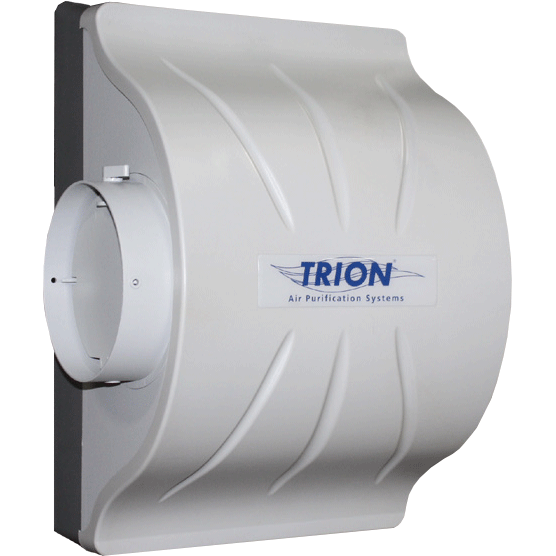
Trion Bypass Style Humidifier: Normal Operation
Be sure to turn the power off before performing any maintenance.
Hi, I'm Jay. This is the Trion/Hermidifier brand bypass style humidifier. Now your model might look different, that parts unimportant, what we're going to talk about is normal opreation. Right now we have the furnace running, we have the humidistat turned all the way up. We have the humidistat spun all the way up so we can show you how this thing looks when it's running. Bypass damper is in the open position, this indicates the location of the door, the door is in this position right now, this position right now. Ok, so you want it in this position, or open, when you want your humidifier to run, which would typically be of course the winter season. So, the bypass damper is open, if you look real close here, you'll see water trickling down the drain, that is normal for one of these bypass units, when it's running. So, water trickling down the drain, not pouring down the drain, that would be abnormal. Not dripping down the drain, that would also be abnormal. Just trickling down the drain, so we're experiencing that now, that's a good thing. We have a humidistat, that is on this particular unit, mounted on the duct work. And we'll show you that.
Now, I'm going to take the cover off of this so we can take a peek while it's running. So, now that I have the cover off, we can take a look at this thing and I can feel water on this pad it's trickling down. So we have water going through the solenoid valve here, there's a little orifice in here that we can't see, and that's metering the water going to the pad so we just have just enough to wet the pad and a little bit left to wash the pad. So, right now, we have water going up here, to the top. It goes into this feed section here, and this thing is a water distribution tray. Looks like a shower head, and it's dripping water onto this tray here. And then down through the pad itself. Whatever does not get absorbed is going into this drain pan here, and then of course down this drain pipe.
Here's that bypass damper I talked about earlier. That's closed. That's open that's basically all this is is a little door that's inside this six inch round pipe. Of course you want it open in the heating season, and what's happening here is in the winter, the furnace is running, hot air is blowing into this supply plenum, that hot air blows this way, through the pad, picks up moisture, back up pass the bypass duct, and that air that's humid now, so we have hot humid air, it blows that way and it blows into the return air duct and gets sucked back into the furnace and eventually redistributed into the home. So, that's whats happening here, that's the cycle. But right now, this unit is working perfectly, and this is what it looks like when it's working properly.
Maintenance
Trion Bypass Style Humidifier: Maintenance
Be sure to turn the power off, before performing any maintenance.
Hi, I'm Jay, and this is a Trion bypass style humidifier. We're going to do normal maintenance to it today. This maintenance is either done at the end of the heating season, to get it ready for next fall, next winter, or in the beginning of the heating season. So, let's start. First thing we want to do, is turn off the power and the water.
Be sure to turn the power off before performing any maintenance. Before performing this service, it is necessary to shut off the water. Find the saddle valve, turn it clockwise, until it stops.
Ok, let's get inside this thing. So, this model has a latch on the top and the bottom, yours might be different, but on this particular one, again, there is a latch on the top and the bottom that you have to press to release. Alright, now here we have our humidifier filter. And there's a little latch here we have to lift up, to get this filter out. Alright, this little damper right here, this bypass damper here is in the way so we're just going to flip it out of the way. And take this out, put that there for a second. So here's the old humidifier filter, we're going to toss this out, and clean this up and put a new one in. So now that we have this thing apart, a lot of models have a water distribution tray that is kind of like this but it has small holes in it, and it goes on the top of the humidifier filter. Now this one doesn't have that, but if yours does, you're going to want to clean this portion up. This one has like a tube that comes across like the top and has little showerheads in it, and this will get some calcium on it. You'll want to kind of wash this thing off, get the calcium off of it. Also, all of them have a little like drain pan on them on the bottom. This particular drain pan does not come out, yours may or may not come out, but if it's removable, take it out and wash it, if it's not, you'll have to wash it in place get it all cleaned up, and make sure that the drain hole is open in it.
Ok, now that we have everything cleaned up, we're going to put it back together. So we're going to get a new humidifier filter, which we have right here. Now, you'll notice there is a spray paint mark right here, that's the top, it's only on the one edge, ok, so that's right here, that's the top. There is no front or back, it doesn't matter, but you do want this spray mark here on the top. So, let's put that in, there we are. And that goes on the top there, This one slides into a track here and here, and snaps into position, alright. That's that. Now, the bypass damper. We closed this so we can get it out of the way so we can have more access, So this is to be closed in the summer time, and open like this, ok, in the winter time. So we're getting this thing ready for the winter, because it's fall right now, so it's now open, and let's put the cover back on. Alright, it's important that if you have latches on yours, you make sure that the latches click into position, because you don't want this thing falling off of your furnace in the middle of the night. Now, let's test it.
Now that everything else is done, you can turn the water back on. Locate your saddle valve, and turn it counter clock wise.
Alright, now that we have the water and the electricity turned back on, and the humidistat spun up to the highest setting possible, and the furnace running, we're able to test it. So, we can look here, and this is normal operation. When this thing is running, there will be water trickling down the drain. If there is water flying out of there like a fire hose, that's not normal that's a problem. But right now, the thing is running, and water, as you can see, is trickling down the drain, so it is working. So now all we have to do is spin the humidistat down, and make sure that the solenoid valve closes and the water stops running, and we're done testing.
Troubleshooting
Trion Bypass Style Humidifier Troubleshooting: Water Leakage
Hi I'm Jay this is a Trion/Hermidifier brand bypass style humidifier. Now yours might look a little different, that part's unimportant, today what we're going to talk about is water leakage. So there are a number of different issues that can come up one, which would be the most common I suppose, would be water leaking down here. So if you happen to have water leaking where the water lines attached to the solenoid valve at that connection usually you can solve that by just getting a couple of wrenches out and tightening up that fitting just a bit usually it's a brass fitting. And normally you know you can give it a quarter of a turn or something like that and that'll fix that problem. If you tighten that up and it's pretty darn tight but it's still leaking then what you're going to have to do is take that connection apart cut the quarter inch copper tubing that you likely have and and get a new brass nut and a new brass furle and put it all back together. Because typically when you have that kind of situation something's wrong with that connection the brass nut is cracked or the furle is flawed. This particular one happens to have a plastic hose and you might have that and still have a brass nut again usually solving the problems involved just tightening it up.
Ok so this particular one has this funny connection here that is a pressure connection so it kind of grabs it and what you do to take it apart is just kind of push up on this little black plastic ring here and you can just pull this thing back out and installing it is the reverse of that you just push it up in there. Until it seats. So it has a little grippers in there and it's self sealing its really a magnificent way of doing things when you you know when it comes to serviceability. So we're gonna take cover office things we look inside.
Now we have the cover off we'll talk about some other possibilities and there's the valve by the way. Another possibility is you have water leaking here on the outlet side of the valve again usually that's just a matter of tightening up that little fitting right here. Another thing we have run into is water sometimes dripping out of the bottom of the unit, kind of the cabinet here. Or out of here where the unit touches the duct work. Usually when it is doing something like that, it's either feeding far too much water up here to top of the pad, or a pad is plugged because it hasn't been replaced for quite a while. These pads need to be replaced a minimum of once a year. If yours is all caked up and looks like a brick, obviously it has not been replaced the last twelve months and needs to be replaced. So that's another thing that can cause leakage. The drain. So if for some reason this drain pad right here is plugged or this pipe here, or say this hose kind of disappears somewhere behind the furnace, and a drain is plugged up on the other end of it and potentially it's full of water and I was overflowing out of the unit itself, then obviously you have a problem with the drain you have to kind of track that down to the end of it take a look and see what's happening maybe the drain hose itself is crushed somewhere. Or it's bent. But like I said you should have the sink full of water you should see it when it's running normally you should see a trickle of water coming down this thing. Let's see what else can happen here. One of things I mentioned was too much water so this one, this particular model, this comes apart and it feeds water to the top up here. Let's pop this out. So this particular model the water runs through this little hose up here and then feeds this. It has like a shower head if you will on this particular model. A lot of them have an orifice in them. That's down here that regulates the volume of water. And over time that little orifice wears out and has a really small hole like a pin hole. Over time that pinhole will get bigger and bigger and bigger kind of like a Grand Canyon started nothing and is now enormous. So there's a little nylon orifice in there and it's tiny it's like the size of an eraser tip on on a pencil. And again with the teeny hole in it. That thing needs to be replaced every, I wanna say every three to eight years. More often the better. Because it does grow in size and the bigger it is the more water it wastes. But we have seen occasions in the past where someone has not replaced those in a rather long time and the hole is enormous, or the nylon itself literally has disintegrated to nothing and waters just flying through this unit and it puts too much water up here and then you get too much water running down to the pad and the water just gets blown off the pad or just rolls outside of the unit and then you have water pouring down the bottom of this unit and down on the floor. And those types of problems are usually associated with and orifice that usually needing replacing.
If you have water leaking out of the cabinet itself let's say coming out the cabinet here on the scene between the duct work in the unit or water pouring into the duct work or dripping out anywhere around here and you look around and you don't really see anything chances are you have something like too much water feeding from the valve up to the top, and flooding this thing. So, that flooding of too much water is usually caused by the orifice being worn out or missing and it goes right here. There is normally a very small nylon orifice that's about the size of an eraser on a pencil. It has an extremely small hole in it and that is what's used to restrict the amount of water that leaves this valve, okay, and goes up and feeds the pad. So, over time, that little orifice in there wears out. And just the water rushing through it over time makes the whole larger and larger and larger. And eventually get so large that, potentially, waters just rushing down this thing and it just can't handle all that water and it will be leaking out of here or we're just wasting entirely too much water. Normal operation when this unit is running and working properly will be water trickling down the drain. If water is flying down the drain, that's a problem. So these orifices here, they need to be replaced every three to five years. Replacing it on this model again fairly simple you turn it off turn off the water take the cover off then press this little ring here, pull the tube out, take the orifice out out, put a new one in, and put it all back together.
On other models this is a brass nut and you have to kill the power to everything and turn off the water get the wrenches out, and loosen it up, take your orifice out and replace it. Another thing that can cause too much water or water dripping out of this thing, is if the pad is shot. These pads need to be replaced minimum of once a year. If you have not replaced your pad in a year or less, potentially this pad can get covered in scale. And if this thing gets covered in scale and looks like a brick then the water can just run all over the place and it can drip into the ductwork it can run off the backside of it and just pour into the humidifier and drip down here. And if that's that's the case just take it apart, clean it up, put a new humidifier filter in it. Hmm. Let's see. Ah. The only other thing I can think of is if you have a plugged drain. So let's just say this hose here is not set up like ours is in the demo unit, and let's just say this hose is coming down, it runs across the floor goes behind the furnace and goes into a drain somewhere and this hose is plugged up or it's crushed flat and water is not flowing. In a set of just seeing water trickling down here the water you have actually a water level and it just climbs all the way up to here and then overflows. So if that's your situation then you just need to take this drain and clear it out or just follow it to find out what's going on now with the other end behind the furnace there where it's crushed. So that's about it that covers all the normal issues that we run into with water leakage.
Trion Bypass Style Humidifier Troubleshooting: Water Not Running
Be sure to turn the power off, before performing any maintenance.
Hi I'm Jay and this is a Trion/Hermadifier brand bypass style humidifier. And what we're going to do today is talk about one of the common questions we get and that is why is there no water coming down the drain of my humidifier, and my house is dry. So if you have that situation where you have a house that's dry and there's no water going down the drain trickling down it and it does not appear to be working, that's what we're going to do today we're going to talk about that.
So the first thing we do is we're gonna make sure that the furnace is running, and the humidistat is spun up as high as it can go and that's what we're going to do now.
Okay, now that we've made sure that the humidistat is spun at its highest setting and the furnace is running we're going to take a look here and we don't see any water trickling down the drain and with this particular model we should have that happening. So there's something going on here, so what we're going to do now is we're going to turn the water off and we're going to disconnect this and take a look to see if there's any water actually here.
Before performing the service it is necessary to shut off the water. Find the saddle valve, turn it clockwise, until it stops.
Alright now that we have the water turned off, we're going to go ahead and disconnect this need to be here from the humidifier and we're going to see what happens. Okay now this particular humidifier happens to have a quick stop connect where you push up on this little black ring and you slide the tube out. A lot of models don't have that they have little brass not here that you have to loosen up , and if that's the case then you have to get a couple wrenches out but this particular one happens to have the pressure style so it was easy to get off. Alright, now that we have the tube in our hand we're going to point it into a bucket and we're going to have someone in the background turn the water back on and make sure that we actually do have water here. Alright, perfect. Alright so as you can see we do have water at this point here so we now we're going to turn the water back off. There we are. And we're going to reconnect it. Here we are. Again this was a lot easier because it has this fancy slip style connector on it. So there we are so now the next they we're going to do is turn the water back on and we're going to test it again.
Now that everything else is done you can turn the water back on. Locate your saddle valve, and turn it counter clockwise.
Alright now we have the water turned back on, the humidistat turned all the way up and the furnace running, and you can see theres still not water trickling down the drain line here and I don't hear any water running so there's still something wrong. So now we're going to check to see if we have voltage here. So this is just twenty four volts on this model so we're going to very carefully remove the wire nuts one at a time. Put our voltmeter on there that's the one. Ok, so we have a voltmeter attached to these wires and we have them separated you want to be careful when you do this that you don't short these wires out to each other or to ground the duct work or anything like that. So we have the volt meter on here they are still connected okay everything is still attached and, we're going to take a look. Okay so we have a little over twenty six volts. So what you want to find here is anywhere from nineteen to twenty eight volts somewhere in that range. AC not DC. And so we have a little over twenty six volts AC which means we do have power to the solenoid valve that's hiding under this cover here so right now this thing should be running. But it's not so apparently we have a problem with the solenoid valve. So I'm gonna take this cover off so we can look inside and actually show you the valve.
Now I have the cover off let's take a look. If look right inside here this is the solenoid valve, and it's printed on here twenty four volts AC. And we do have power to it we have a little over twenty six volts AC power to it. We do have our water turned on right now and there's nothing happening there's no water running down the pad. Nothing so what we have here is a bad solenoid valve. Ok, now we're going to talk about the other possibility. We have the water turned on we have the furnace running and we have the humidistat spun up to its highest position, and we have no power. So there is something wrong and that something is either in the humidistat or the control wiring going to this position or some other situation with the way it's interfaced with the furnace. So in this particular instance we verified we had water here we don't know about the solenoid yet because we don't have any power to it to test it but at this point the problem is the control circuit, not the humidifier.
Trion Bypass Style Humidifier Troubleshooting: Water Won't Stop Running
Be sure to turn the power off, before performing any maintenance.
Hi, I'm Jay, and this is a Trion Bypass Style Humidifier. Now one of the questions we get every year is, "why won't the water shut off to my humidifier?" So right now, there is water trickling down the drain, and if you turn off the humidistat, and turn the power off to the furnace, and water still continues to run, there's one more thing you can try. Ok, and that is to disconnect one of these wires. So we're going to disconnect one of the wires to the solenoid valve. Now, that should turn off electricity to the valve, for sure, ok. And this water should stop trickling after a minute or two.
So, here's the solenoid valve. We've taken the cover off of this unit so we could take a look inside. Here's a solenoid valve, and you can see the wires are still disconnected, there's still water trickling down the drain. So, after a couple of minutes, that should've stopped. So, this valve right here, is stuck open. All it is is a small electric water valve. And, what we're going to do is replace it.
Trion Humidistat Overview: How It Works
Be sure to turn the power off, before performing any maintenance.
Hi, I'm Jay, and this is the Trion/Hermadifier brand humidistat. Now, on our demo unit here we have it duct mounted, it can be wall or duct mounted. Again, our particular application here we just to duct mount it. It has little pictograms on it, one drop, two drops, three drops, and that indicates humidity level. For a set point. So if we turn this thing here, we turn it, there you go, turn it real slow and you can hear/listen real carefully and it makes a clicking noise. So, it's pretty humid here in the video studio right now, so it's clicking right over here where it says really high humidity. But again, it's the video studio and it's the middle of summer. So, what you want to do is generally speaking you'll want to set it somewhere here in the middle. And the way you set these things is in the wintertime, what you don't want is the windows to sweat. So, depending on the construction of your home, how cold it is outside, the types of windows you have, you potentially will get windows to sweat. The ideal humidity is somewhere around 45-50 percent, that's what people are comfortable at inside if your home at winter. However, if it is 20 degrees below zero outside, you're probably not going to be able to keep your house at 45-50% because your windows are going to sweat. So, what you do is adjust this kind of on a regular basis in the winter. So, if it's really cold outside and your windows start to sweat, just go over to this thing and turn the humidity down a little bit. Wait a couple of days, if the windows stop sweating, you're good. If if they don't turn it down a little bit more, so you kind of have to play with it back and forth until you get where it's goin gto work for your particular home.
Now, the colder it gets outside, the lower you're going to have to set this thing. As it warms up outside, let's say 50 degrees, and you're using your heat for instance, you can go with a little bit higher setting. Again, you can go over 45-50% over in your house, if you can avoid it, but you do have to play this game of adjusting the humidity setting on a periodic basis in the winter time. Now, this is an older style humidistat, it is is also duct or wall mount, and you can see, it looks quite a bit different than this one. This one happens to have on it a little chart, and readings. So, this one goes from 0-I'm sorry, 80%, total humidity, all the way to off. And the range is really 80 to 20 percent. So this one here you can kind of twist the dial, and you can listen to where it clicks, and right now it's saying that it's about 48% in here. This old thing just came out of the warehouse, so it has to adjust to the video studio right now, so I'm not exactly sure what the real humidity setting is, or the total in this room until this thing has a chance to relax a little bit. Now on this one, it has a little chart here. So it's saying that at -20 they want a 15% setting, 0 a 25% setting, and above 20 a 35% setting, or higher. Now these are recommended settings. So let's just go here 0 degrees outside they want 25%, that's probably going to work for a lot of applications, if your house is really well insulated and you have triple pane windows you may be able to get by with a little bit of a higher setting, which would make you more comfortable in the house, but these are kind of recommended settings with typical construction. Again, this one is duct or wall mount, there are some pieces that come with this that allow you to do that, same with this one. It has some accessories that allow you either to duct mount it or wall mount it, we've chosen to duct mount it just because this is our demonstration unit and that's just easier to do here to show you how this thing works. And that's it as far as humidistats go.
Documentation
Still Need Help?
Live help is available. Feel free to contact us.
Browser Not Supported
You are using Internet Explorer as your browser, which is no longer supported by our website. Because of this, you can view products but not place orders using Internet Explorer on our site.
Please update your browser to any of the modern browsers listed below or use a different internet browser to place an order on this site.
If you have any questions or need assistance with placing an order, please contact us at 800-825-2148 or [email protected]


